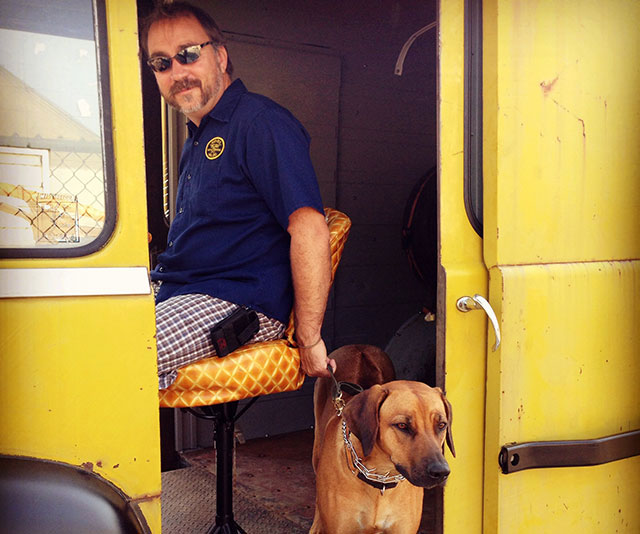
PORTRAIT OF A RESTORATION OF A 1949 DODGE ROUTE VAN, THE SEQUEL.
Every great old car has a history. When we decided we wanted something unique to transfer our finished bags to our factory outlet store, we had no idea it would end up becoming a story in and of itself. CEO Jim Markel puts the finishing touches on the adventure here in part 2 of our Sherpa Jr. Restoration Project.
SOME CALL IT LIPSTICK ON A PIG, WE CALL IT SHOWING RESPECT
Now that the mechanicals are mostly sorted out it was finally time to get some of the bigger dents beaten down and our missing fender reattached. Getting this beast running requires a quick lesson and puts you into a time machine back to the days of manual everything.
Starting the Lil Sherpa goes something like this:
- Turn key to the right one click.
- Pull out choke knob.
- Clutch in.
- Step on starter lever with toe and heel to gas pedal while crossing fingers.
Sounds simple enough and with practice will certainly become routine. Of course vehicles with quirks are like sewing machines that only seem to work for a particular operator. We have noted this phenomenon in the past and we have chalked it up to ghosts in the machine. Our vision for this "rat rod" was simple enough, fix what needed to be fixed and try to retain as much of the original patina without going too far.
Simple solution was to paint the fenders in an epoxy primer.
The boys over at Blue Body and Paint were down for our minimalist approach and given the condition of the roof panels it was probably the best option. We decided to send the interior panels off to Industrial Coating Solutions for powder coating in lieu of regular painting. This process uses high temperature to bond the coating directly to the metal. We used this extensively in the factory on all sorts of hard-to-cover objects. Given the complexity of the metal panels this was the easiest solution for a quick and durable surface.

Route van ceiling solution
Firing the beast up I ground the gears and made my way downtown to Critelli Glass for a new windscreen and driver's side plate glass. Unlike some early vehicles the glass in the Route Van is all flat and fairly easy to replicate. The hardest part was finding a proper rubber gasket to seal the deal. They did some scrounging the back of the shop and found 32 feet of some old window gasket that worked quite well. Making my way back through downtown I was amazed at the visibility in that huge windscreen which rivals the size of our Big Oxx Mercedes Sprinter. Albeit the technology factor from one to the other is something to marvel at.
I am still trying to sort out the double clutch routine due to the lack of synchronized gearing in the transmission. I managed to make it back to the shop without breaking too much of a sweat.
Driving the Sherpa Jr. is a bit like riding an old cranky motorcycle that requires your full attention. There will be no texting on the cell phone or stuffing of the face, since power steering was not an option and you best "keep your eyes on the road and hands upon the wheel".
Sorting through the cardboard box of bolts and parts it was apparent that we were still missing a few screws. Well that is not debatable, since only a nut job would try to make this thing work in the first place. With Perry losing hope every day it was with great joy that I informed him it was time to finally reassemble the interior. Working through the firing sequence I got more than one strange look from Mr. Jones. It seems over that last year or so he had lost a little faith that this "turd nugget" would ever be in service to which I replied, "But Perry, we just need to mount the fire extinguisher and add this bad boy to our AAA account and we're good to go!"
... To which I received more of Perry's patented 1,000 yard stare-- man what a tough audience.
It was an already warming July day and it was time to motor back to the welding shop to borrow some tools and whatever spare parts we needed to get the job done. I had already scoped out the carcass of Koombie's ultra four racer. It looked like a perfect fit for some standouts for the side rails. Time to grab the porta band and recycle some tubing. A nibble here and a nibble there, he will never miss it...
After easily getting the side rails back on it was time to delve into the interior. Laying out all the assorted pieces it all seemed simple enough but I know better from prior experience. I would have bet money that there was a predetermined order that this puzzle would go together by. Still, after some head scratching, it all seemed fairly straightforward. So without further delay Perry and I decided to get the pocket door reassembled. Two hours later we were still fighting the first bolt and considering firing up the welder for a more permanent solution. Finally with a little finesse and WD40 we had the panel in and proceeded to motor along with the others.

Route Van Interior comes together.
In places the placement was fairly apparent. In others, well it took a few times of dis-assembly to get what we wanted. Then it came down to the final piece in the roof and it became all too clear that this was the first piece and no amount of screaming and cursing was going to get in behind that first bolt. What to do? Time to go full Kustom with a "K" and cut it to fit...
I know, some purist is boiling over in his chair about now, but we had just about enough of the tetanus encrusted steel and Hantavirus dust. Looking like a pair of urchin coal miners after a bad day in the hole we were a sorry sight. Still, at the end of the day the beast was actually starting to shape up which would leave a few odds and ends for day two.
When we first acquired our project it was about half disassembled and some of the parts lying about were a mystery. If you have ever gone antiquing and found items that defy description you know what I am talking about. One mangled piece of metal had the word "starboard" written on it so that at least told me what side it went on. Being a good little Jarhead I still remembered my Port=Left and Starboard=Right instruction from boot camp.
Further investigation of the relic indicated that it was actually the spare tire holder. With a little hammer persuasion and some fresh bolts and an assist from Koombie, we got the mount back to its original home. While most of the parts were still there, it seems that some items had literally rotted away in the last half century or so. What to do?

Route Van Custom Loading Ramp.
When in doubt surf the scrap pile and acquire what your little heart desires. Sitting in plain view were some intricate stainless steel panels that looked to have come off a downed starship. Ah Koombie will never miss them, I decided to get them installed before he returned from lunch and discovered my appropriation. This is Montana, and sometimes you just have to take what you want. Well at least that is how it works around good friends who happen to be pack rats of note. It was about time to get this pig ready for the show, so without further wrenching the day had come for a steam clean and test run.
A few trips around downtown and I was already starting to get the hang of it. Another slightly disconcerting feeling is the way you're sitting in the cab. Facing that huge windscreen with the side doors locked open you really feel exposed. Careening around a corner at top speed I got the feeling that I could be bucked out if I let go of the steering wheel.
Did I mention the total lack of safety equipment? Not even a seat-belt... guess those route drivers were slightly expendable back in the day.

Route Van Tire Mount.
Our Little Sherpa project has certainly given us an appreciation for the ways things used to be done. With one eye on the road ahead and another in the mirror we like to think that Red Oxx is keeping traditions going while changing with the times online.
Cheers,
Jim
P.S. Look for the continuing saga in pictures in the photos album 'Restoration of a 1949 Dodge Route Van' on our Red Oxx Bags Facebook page.

Leave a comment
This site is protected by hCaptcha and the hCaptcha Privacy Policy and Terms of Service apply.